
Celebrated chef, restaurateur and food writer Mark Hix shares his recipe for the delicious festive Italian dessert, Panforte.
Chocolate panforte
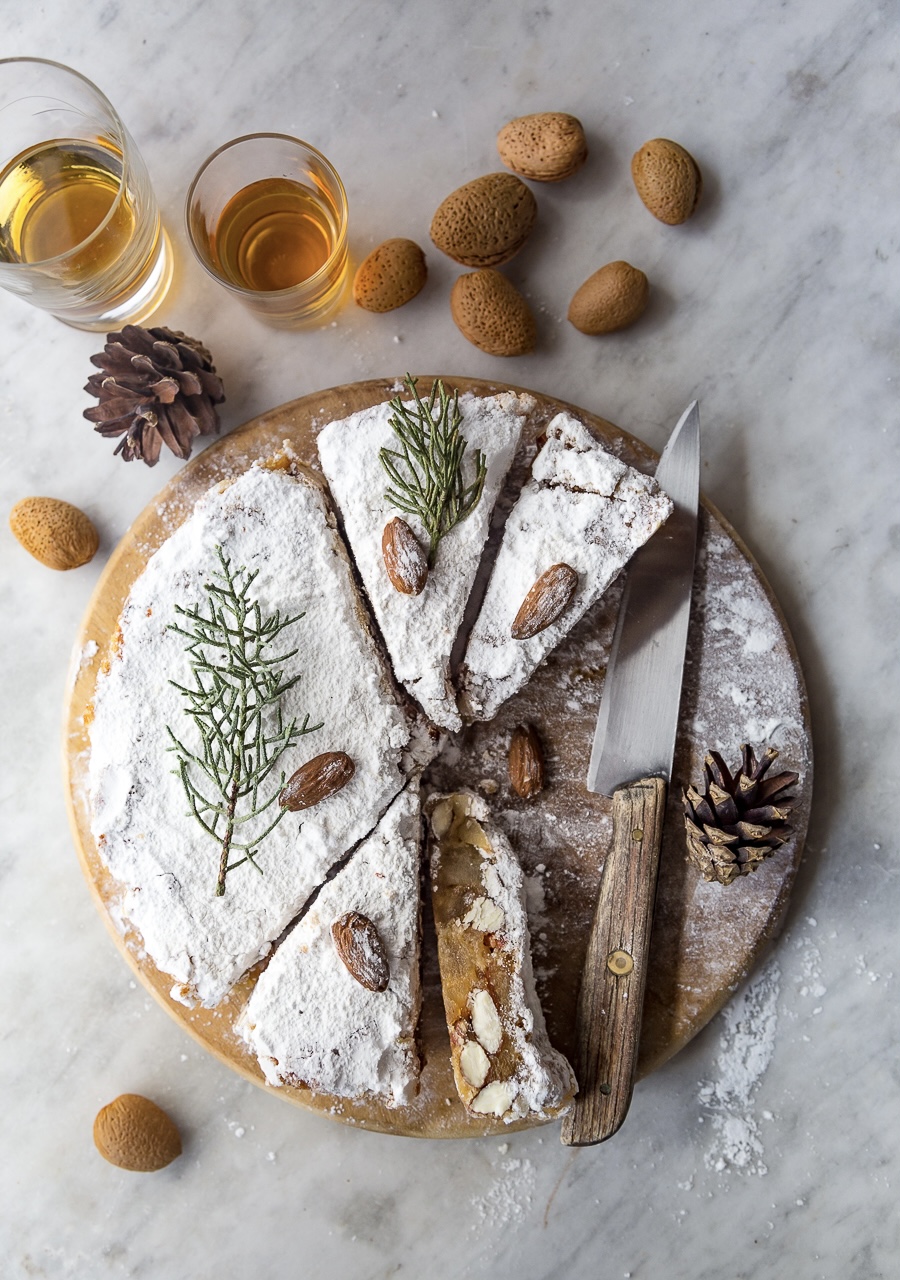
Panforte translates into strong bread, though it is in fact more of a festive sweet thing you would eat after a meal. Historically it's known as Siena cake as the Italian city is thought to be the first to get into cooking with sugar and spices such as white pepper. Adding chocolate is a more recent variation, but even so it still retains that medieval flavour. If you think you're more likely to eat the panforte with Parmesan - the Italian equivalent of our Christmas cake with Stilton - it's best to leave out the cocoa. You can keep your panforte wrapped in clingfilm for 2-3 months.
Ingredients
Makes 2 x 12cm cakes
2-3 A4 sheets of rice paper
110g hazelnuts
110g whole almonds
125g candied mixed peel, preferably the chunky Italian style, chopped 100g candied pineapple chopped into 1/3cm pieces
Grated zest of 1 lemon 75g plain flour
1tsp ground cinnamon 1⁄4 tsp ground coriander 1⁄4 tsp ground cloves
1⁄4 tsp ground nutmeg
Pinch of white pepper
15g good quality cocoa powder 150g caster sugar
120g clear honey
50g unsalted butter
Icing sugar to finish
Line small 12cm x 5-7cm deep cake tins with a removable bottom, or a flan ring on a baking sheet, with circles of rice paper and cut two more for the top. Cut long 5cm strips to line the sides. You may need to use a couple strips and overlap them.
Toast the nuts under a hot grill, turning them so they brown evenly, then leave to cool. Put the nuts in a bowl with the mixed peel, pineapple, lemon zest, flour, spices and cocoa powder and mix well.
Pre-heat the oven to 150c/gas mark 2. Put the sugar, honey and butter into a saucepan and melt them, stirring occasionally so they are well mixed. Simmer gently for 3-5 minutes until the syrup reaches 120oC on a sugar thermometer or a little of it dropped into cold water forms a soft ball when moulded between your finger and thumb.
Pour the syrup into the nut mixture and quickly mix well with a wooden spoon before it stiffens too much. Transfer into the lined tin and push into the edges and smooth the surface. Put the other two discs of rice paper on top. Put a piece of tin foil on top so the rice paper doesn't burn.
Bake for 35 minutes then leave to cool for 30-40 minutes in the tin. Sometimes they can be tricky to get out but you can easily re shape with a palette knife but they do actually look great a little wonky so they don’t look like they have come out of a factory.

